Bake the Perfect Honey Wheat Bread at Home
More than 60% of home bakers love making honey wheat bread. It’s a mix of whole grain goodness and softness. But many think it’s too hard to make at home. This guide will show you how to make it just like a bakery.
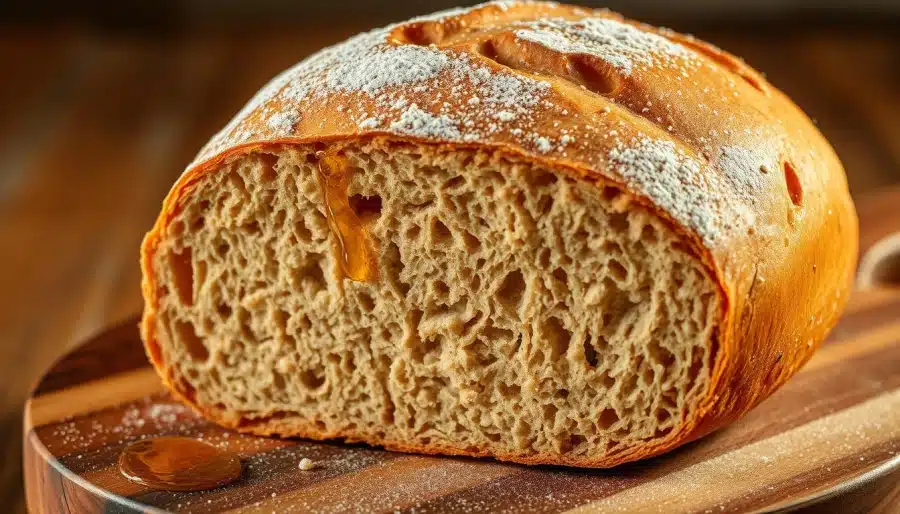
Honey wheat bread uses all-purpose flour for its structure and whole wheat flour for its richness. Honey adds sweetness and keeps it moist. Learn how to mix these ingredients to make a loaf that’s golden and fragrant. This guide will help you make a bread that’s both soft and healthy.
Table of Contents
Introduction to Soft Honey Wheat Bread
Baking honey whole wheat bread recipe at home makes your kitchen a place of creativity and health. You get to pick the best ingredients, avoiding preservatives. This recipe is more than just easy—it’s about making something good and personal.
Benefits of Baking at Home
So, why do it yourself? Here’s what you get:
- Control over what goes into your bread, like organic honey and unbleached flour.
- Healthier, fresher bread compared to store-bought.
- It’s cheaper for families, saving money on bakery prices.
- You can change it up: try different honey amounts or add nuts and seeds.
Understanding Key Ingredients
Each part is important for the bread’s taste and texture:
- Milk or water: Keeps the dough moist for a soft bread.
- Organic honey: Adds sweetness and helps with fermentation and keeping moisture in.
- Whole wheat flour: Gives the bread fiber and a rich flavor.
Learning about these ingredients helps your honey whole wheat bread recipe turn out right every time. You can play with the ingredients to find the perfect mix of sweet and texture.
Tools and Ingredients for a Perfect Bake
Getting good at the whole wheat sandwich bread recipe begins with the right tools and ingredients. A digital scale is key for exact measurements. This is crucial for yeast to work right and for the dough to be just right. A strong mixing bowl and a dough scraper make it easy to handle sticky dough. A stand mixer, like KitchenAid, makes kneading a breeze.
- Digital kitchen scale (no cups for flour)
- Metal or glass mixing bowls
- Stand mixer or clean hands for kneading
- Loaf pan (greased or lined)
- Whole wheat flour (70% bread flour, 30% all-purpose for balance)
- Active dry yeast (1 package or 2¼ teaspoons)
- Honey (2 tablespoons for sweetness and moisture)
- Warm water (105–115°F to activate yeast)
- Salt (1 teaspoon to enhance flavor)
Flour ratios are important: too much whole wheat makes the dough too dense. Use a bench scraper to clean up and a sharp knife for scoring the loaf before baking. Always check yeast expiration dates to avoid failed rises. With precision, you’ll get a golden, airy loaf every time.
Step-by-Step Preparation Process
Learning to make honey whole wheat bread is all about the details. Each step is crucial for the right texture and taste. From setting up your workspace to shaping the dough, every move counts.
Prepping Your Workspace
Start by clearing your counters and getting your tools ready. You’ll need bowls, a spoon, and a clean area. Make sure your yeast and honey whole wheat bread ingredients are easy to find. This way, you won’t get caught off guard.
- Wipe surfaces with a damp cloth
- Arrange tools in baking order
- Preheat oven only after shaping dough
Combining Dry and Wet Ingredients
First, mix the dry ingredients to prevent clumps. Here’s a quick guide:
| Category | Ingredients | Action |
|---|---|---|
| Dry | Flour, salt, yeast | Whisk until evenly dispersed |
| Wet | Warm water, honey, milk | Combine in a jug before adding |
Then, slowly add the wet ingredients to the dry. Stir gently to wake up the yeast without overheating.
Kneading and First Rise
Knead the dough until it’s smooth and elastic. Here’s how:
- Knead on floured surface 8-10 minutes
- Shape into a ball and place in greased bowl
- Cover with a cloth and let rise in a warm spot
A good first rise will double the dough’s size in 45-60 minutes. If it doesn’t rise enough, your bread will be dense.
Baking Techniques for Honey Wheat Bread
Perfect bread recipes with honey need careful oven control and timing. Follow these steps for a golden crust and airy interior.
Setting the Ideal Temperature
Preheat your oven to 350°F. This temperature is scientifically proven for even baking. Use an oven thermometer to check if it’s right.
A colder oven makes dough bake longer, risking dryness. Higher heat can burn the outside before the inside is done. Place dough in the center rack for even heat.
Time Management for Rises
Watch the dough closely during rising phases. The first rise should double in size, taking 1–1.5 hours in a warm, draft-free spot. Overproofing makes the bread dense, while underproofing causes it to collapse.
For the second rise after shaping, aim for 30–45 minutes. Check if it’s done by gently pressing the dough. If it springs back slowly, it’s ready.
One last tip: brush the loaf with melted butter right after baking. This keeps it moist, giving it the softness of top-notch bread recipes with honey. With practice, you’ll get the texture and flavor right every time.
The Role of Honey in Enhancing Flavor
Honey does more than sweeten honey wheat bread. It changes the game. It softens the dough with natural enzymes, keeping it moist for days. Its sweetness balances the earthy whole wheat, adding depth without being too much.
“Honey’s acidity slightly lowers dough pH, fostering yeast activity and golden crust browning.”
- Sweetness: Adds a subtle, complex sweetness that deepens as the bread bakes.
- Moisture: Retains humidity in crumb, preventing dryness.
- Fermentation: Enhances yeast activity, aiding rise and texture.
Choose raw or wildflower honey from local producers like Sue Bee or Tupelo Honey for a richer taste. Too much honey can hide the wheat’s nutty flavor—use 2-3 tablespoons per loaf. For the best taste, mix it with whole grain flours and a bit of salt.
Mastering the Dough: Tips and Tricks
Getting your honey whole wheat bread recipe just right begins with knowing how dough behaves. These tips will help you get consistent results every time.

Achieving the Right Consistency
Here’s how to check the dough’s texture:
- Pinch the dough: It should feel soft but not sticky.
- Perform the windowpane test: Stretch a small piece between your fingers. If it forms a thin, translucent film without tearing, it’s ready.
Perfecting Fermentation
Find the right balance with these signs:
| Issue | Adjustment |
|---|---|
| Under-proofed | Let rise 15–30 mins longer in a warm spot. |
| Over-proofed | Shape dough again and refrigerate 10 mins before baking. |
Avoiding Common Pitfalls
Stay clear of mistakes with these tips:
- Limit kneading to 8–10 mins to avoid toughness.
- Adjust hydration: Add 1 tbsp flour if too wet, or 1 tbsp water if too dry.
- Check oven temperature with a thermometer for accurate proofing (75–80°F).
Mastering these steps will make your honey whole wheat bread recipe a hit in the kitchen. Remember, patience and precision are key for the best results.
Essential Tips for Soft honey wheat bread
Mastering the whole wheat sandwich bread recipe is all about texture and flavor. These tips will help your loaf stay moist and tasty every time.
Moisture Retention Strategies
- Brush warm butter or oil onto the cooled loaf to seal in moisture.
- Replace water in the recipe with milk for extra tenderness.
- Wrap the bread in a clean kitchen towel before storing to lock in humidity.
Using Natural Sweeteners
Honey does more than sweeten—it also helps with browning and moisture. Try these alternatives in your whole wheat sandwich bread recipe:
| Sweetener | Moisture Impact | Flavor Notes |
|---|---|---|
| Honey | Retains humidity longer | Slightly floral, enhances browning |
| Maple Syrup | Maintains softness | Rich, caramel undertones |
| Agave Nectar | Hydrates dough texture | Mild sweetness, pairs well with spices |
Try different ratios in your recipe to find the perfect balance. Even small changes can make a big difference!
Variations: Honey Whole Wheat Bread Recipe Tweaks
Make your honey whole wheat bread your own. These changes let you tweak texture, nutrition, and taste. You can do this without losing the bread’s softness.
Healthy Ingredient Substitutions
Try replacing up to 30% of the whole wheat flour with:
- Oat flour for extra fiber and sweetness
- Pumpkin puree to boost moisture and vitamins
- Psyllium husk powder for gluten-free adaptations
Flavor Enhancements with Seeds and Nuts
Add 1/4 cup of these mix-ins during kneading:
- Chia or flax seeds for omega-3s and crunch
- Toasted sunflower seeds for nutty depth
- Finely chopped pecans or walnuts for richness
Creative Serving Ideas
Turn your loaf into different meals:
- Layer with almond butter and banana slices
- Crumble into soups as a hearty garnish
- Brush with olive oil and grill for open-faced sandwiches
Feel free to experiment. Change one ingredient at a time to keep the bread light and fluffy. Your honey whole wheat bread is a blank slate for new ideas.
Pairing Your Bread with Delicious Dishes
Once your honey wheat bread is baked, explore creative ways to enjoy its sweet, nutty flavor. Its soft texture and mild sweetness shine best when paired with contrasting or complementary ingredients. Start your day with a warm slice toasted, spread with butter, and drizzled with honey. For an extra treat, try French toast—dip thick slices in a milk-and-egg mixture with cinnamon, then cook until golden. Serve with maple syrup and fresh berries for a breakfast that highlights the bread’s natural sweetness.

- Lunch: Build sandwiches with turkey, avocado, and honey-mustard dressing. The bread’s honey flavor balances tangy spreads and savory fillings.
- Soups and stews: Tear chunks into hearty soups like minestrone or butternut squash soup for a rustic touch. Its softness soaks up broth perfectly.
- Snacks: Spread with almond butter and top with banana slices. The honey notes enhance the nutty spread’s flavor.
Experiment with toppings like goat cheese and honey for a savory-sweet snack. For dinner, serve slices alongside roasted chicken or grilled vegetables. The bread’s subtle sweetness cuts through rich dishes, adding depth to meals. Its versatility makes it a staple for everything from casual picnics to elegant brunch spreads.
Troubleshooting Common Baking Issues
Even the most skilled bakers sometimes face problems when baking honey wheat bread. This section will help you solve common issues to ensure success every time.
How to Spot Under-Proofing
If your honey wheat bread feels dense or flat, it might not have proofed enough. To check, gently press the dough. If the indentations stay, it’s under-proofed. To fix it, warm the dough to 75-80°F for 30–60 minutes. Watch for it to double in size to avoid overproofing.
Over-Kneading Solutions
Over-kneading can make your honey wheat bread tough. Look for a dry, stiff dough. If you see this, stop kneading right away. Let the dough rest for 10 minutes, then fold it gently a few times. For future batches, knead for only 8–10 minutes.
Fixing Crust and Texture Problems
Having a too-hard crust or a crumbly texture? Here are some fixes:
- Soft crust: Reduce baking time by 5–10 minutes.
- Crumbly texture: Add 1–2 tablespoons of water to the dough next time.
- Uneven texture: Make sure to knead evenly and check your oven’s temperature.
Remember, the more you practice, the better you’ll get. Try small changes to improve your honey wheat bread every time.
Storing and Enjoying Your Homemade Bread
After baking your honey whole wheat bread, keeping it fresh is key. Follow these steps to keep it tasty and soft.
“Storing bread properly is key to preserving its quality,” advises the USDA.
Proper Storage Techniques
Here are ways to keep your bread fresh:
| Method | Duration | Steps |
|---|---|---|
| Airtight Container | 3–5 days | Seal in a container at room temperature. |
| Refrigeration | 5–7 days | Wrap in parchment and plastic wrap. |
| Freezer | 2–3 months | Double-wrap in foil and plastic before freezing. |
Reheating and Serving Tips
- For toast: Warm slices in a toaster on low heat for 15–30 seconds.
- Oven method: Heat slices at 350°F (175°C) for 5 minutes for a crisp crust.
Serve with butter, honey drizzle, or as a base for sandwiches. Let it cool before slicing to avoid crumbling.
Conclusion
Homemade soft honey wheat bread is a mix of easy and personal. This guide shows how to make a loaf that’s healthy and flexible. You can control what goes into it, avoiding additives and making it just right for you.
Important steps like scalding milk and using the right yeast make the bread perfect. If you run into problems, like uneven rising, there are solutions. Storing your bread right keeps it fresh for a while.
Try adding seeds or nuts to make your bread even better. Or, go for a sourdough for a tangy twist. Every change you make improves the recipe. Share your ideas with others to keep getting better.
With time, your kitchen will become a place where you make amazing bread. It’s healthier, tastes better, and is all yours. Making bread is a journey of patience and creativity. Each loaf is a personal victory.
FAQ
What is the best way to ensure my honey whole wheat bread rises properly?
To get your honey whole wheat bread to rise right, use fresh yeast. Make sure to activate it with warm water. Let the dough rise in a warm, draft-free spot until it doubles in size. Check it often to avoid over-proofing.
Can I substitute ingredients in the honey whole wheat bread recipe?
Yes, you can make your bread your own by swapping out ingredients. Try almond milk for a dairy-free version, or add spelt flour for more nutrition.
How do I store leftover honey wheat bread to keep it fresh?
Keep your leftover honey wheat bread fresh by storing it in an airtight container at room temperature. You can also wrap it in plastic or foil. For longer storage, freeze slices and toast them straight from the freezer.
What type of honey is best for the recipe?
Choose local, high-quality honey for the best flavor and moisture in your bread. Clover or wildflower honey are great choices.
Can I use whole wheat flour exclusively instead of mixing with all-purpose flour?
Yes, you can use only whole wheat flour for your honey whole wheat bread. But it might be denser. You might need to adjust the liquid because whole wheat flour soaks up more.
What is the ideal temperature for baking honey wheat bread?
The best baking temperature for honey wheat bread is between 350°F to 375°F (175°C to 190°C). This ensures a golden crust and a soft inside.
How long does homemade honey wheat bread typically stay fresh?
Homemade honey wheat bread stays fresh for 3 to 5 days at room temperature. For longer freshness, freeze it, and it can last up to 3 months.
How can I troubleshoot if my bread does not rise?
If your bread doesn’t rise, check your yeast’s freshness. Make sure the water for activation is not too hot or cold. Cold dough or drafty spots can also stop it from rising.
How did you like the recipe?
There are no reviews yet. Be the first one to write one.