Easy Homemade Biscuits Recipe
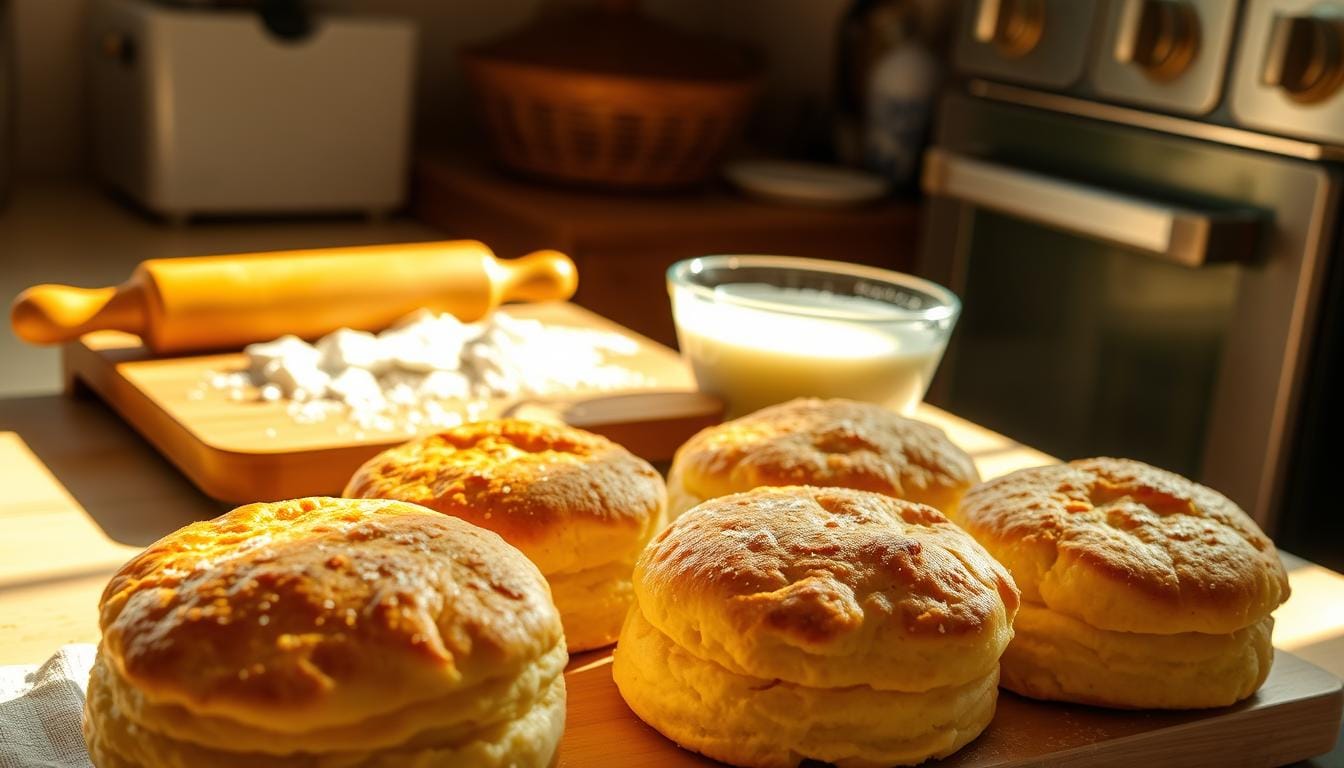
There’s something magical about pulling golden, flaky pastries from the oven—the kind that crumble just right and fill your kitchen with warmth. Maybe it reminds you of weekend breakfasts with family or cozy mornings where time slows down. Whatever your story, mastering this classic comfort food is simpler than you think.
This guide walks you through creating tall, tender biscuits using everyday staples like all-purpose flour and baking powder. Cold butter is your secret weapon here—it creates steam pockets as it melts, lifting the dough into airy layers. Trusted by professional bakers and home cooks alike, this method guarantees consistent results.
You’ll learn how to mix ingredients without overworking the dough, cut perfect rounds, and bake them to buttery perfection. Whether paired with jam or stacked high for sandwiches, these versatile treats adapt to any occasion. Best of all, no fancy tools or hard-to-find items are required—just your hands and a little patience.
Table of Contents
Essential Ingredients & Quality Tools for Homemade Biscuits
Great recipes start with the right foundation. Your choice of components and equipment directly impacts texture, rise, and flavor. Let’s break down what truly matters when crafting tender, layered results.
Must-Have Ingredients for Biscuit Perfection
All-purpose flour forms the base, providing structure without toughness. Opt for unbleached varieties—they absorb liquids better. Cold, high-fat butter (like Kerrygold) creates steam pockets for flaky layers. Salted European-style options add depth.
Buttermilk’s acidity activates baking powder, ensuring a quick rise. If unavailable, mix milk with lemon juice. Fresh baking powder is non-negotiable—test it by dropping a teaspoon in warm water. Bubbles mean it’s active.
Recommended Kitchen Tools for Efficiency
A pastry cutter or food processor blends butter into flour without melting it. Metal baking sheets conduct heat evenly, preventing soggy bottoms. Stainless steel mixing bowls chill ingredients faster than plastic.
- Bench scraper: Shapes dough cleanly
- Sharp biscuit cutter: Prevents sticking
- Parchment paper: Simplifies cleanup
Chill tools like bowls and cutters before use. Cold surfaces keep butter firm, which is critical for layered results. Handle dough gently—overmixing leads to dense textures.
Understanding the Science Behind Perfect Biscuits
Ever wonder why some doughs rise into cloud-like layers while others turn dense? The answer lies in chemistry—specifically, how key ingredients react under precise conditions.
The Role of Baking Powder, Baking Soda & Butter
Baking powder and baking soda are your dough’s invisible architects. When combined with liquid, they release carbon dioxide bubbles. These expand in the oven’s heat, lifting the dough upward. Cold butter plays double duty: its fat coats flour proteins to limit gluten formation, while its water content turns to steam, creating flaky pockets.
Timing is critical. Mix dry and wet ingredients for just 2-3 minutes—overmixing activates gluten, leading to toughness. Measure leaveners accurately: 1 teaspoon too much can cause bitter flavors or collapse.
Shaping matters too. Pressing the dough into a rectangle before cutting ensures even layers. A sharp cutter slices cleanly without compressing edges, allowing maximum rise. Twisting the tool seals layers, while a straight press lets them expand freely.
Data shows combining both leaveners boosts browning and fluffiness. Baking soda neutralizes buttermilk’s acidity, while powder provides extra lift. This synergy creates golden tops and tender crumbs—proof that baking is equal parts art and science.
Mastering the Dough: Mixing and Cutting Techniques
Creating tender pastries requires mastering two critical steps: mixing and cutting. Handle these with care, and you’ll unlock the airy layers and golden edges that make breakfast worth waking up for.
Mixing Dry and Wet Ingredients Without Overworking
Start by whisking 2 cups of flour, 1 tablespoon baking powder, and 1 teaspoon salt in a large bowl. This evenly distributes leaveners while seasoning every bite. Pour in chilled buttermilk slowly—use a light hand to stir just until the dough comes together. Overmixing activates gluten, leading to tough results.
Measure liquids precisely. Too much buttermilk makes dough sticky; too little leaves it crumbly. For accuracy, level your measuring cup with a knife. Work quickly to prevent butter from warming in the bowl.
Cutting Cold Butter Into Flour: Tips & Tricks
Grate frozen butter directly into the dry mix using a box grater. This creates pea-sized pieces that melt evenly during baking. If using a food processor, pulse 5-6 times—watch for sandy texture with visible butter flecks.
No grater? Cube cold butter and press it into flour with your fingertips. Stop when the mixture resembles coarse crumbs. Chill the bowl for 5 minutes if your kitchen is warm. This preserves steam-creating pockets for flaky layers.
Whether shaping dough for breakfast sandwiches or side dishes, these techniques ensure consistent results. Remember: gentle hands and cold ingredients are your allies.
The Folding and Shaping Process Explained
The difference between good pastries and exceptional ones lies in the folds and turns of the dough. Proper technique transforms uneven lumps into airy, golden-brown masterpieces. Let’s explore how strategic layering and precise shaping elevate your results.

Step-by-Step Folding Technique for Flaky Layers
Press your dough into a ½-inch thick rectangle on a surface dusted with dry ingredients. Fold one side over the center, then the opposite side like a letter. Rotate 90 degrees and repeat 3-4 times. This builds distinct steam pockets for flaky separation.
Use this table to compare folding methods:
| Method | Folds | Layer Count | Texture |
|---|---|---|---|
| Single Fold | 1 | 8 | Moderate Flake |
| Double Fold | 2 | 16 | Pronounced Layers |
| Triple Fold | 3 | 24 | Ultra-Flaky |
Chill dough for 10 minutes between folds if butter softens. Re-dust with dry ingredients to prevent sticking without adding excess flour.
Shaping the Dough from Rectangle to Perfect Biscuits
Press a sharp biscuit cutter straight down into the folded dough—no twisting. Twisting seals edges, limiting rise. For uniform shapes, arrange cuts close together. Gather scraps gently and reshape once.
If edges look rough, smooth them with fingertips dipped in dry ingredients. Place rounds on a baking sheet with sides nearly touching—they’ll rise upward instead of spreading. Brush tops with milk for deeper golden brown coloring.
Variations matter: Taller rounds bake slower but yield softer centers. Thinner cuts crisp up faster. Adjust based on your side dish needs or main course pairings.
Baking to Perfection: Oven Tips and Timing
The final transformation from dough to golden delight happens in the oven. Proper heat management and placement determine whether your efforts yield towering layers or flat disappointments. Let’s explore how to harness your appliance’s power for bakery-quality results.
Achieving Golden Brown Edges and Proper Rise
Preheat your oven to 425°F—the sweet spot for activating baking powder while preventing burnt bottoms. Cold dough hitting a hot surface creates instant steam, lifting layers upward. Place rounds 1 inch apart on the sheet. They’ll support each other’s rise while developing crisp sides.
Use this temperature guide for adjustments:
| Oven Temp | Bake Time | Texture |
|---|---|---|
| 400°F | 14-16 mins | Softer crust |
| 425°F | 12-14 mins | Balanced crispness |
| 450°F | 10-12 mins | Darker edges |
Buttermilk’s acidity promotes browning—brush tops with milk for extra shine. Check edges at the 10-minute mark. They should show honey-colored streaks when ready. As one baker notes:
“Your nose knows—when the kitchen smells like toasted butter, it’s showtime.”
Rotate the pan halfway through baking if your oven has hot spots. Let pastries cool 2 minutes before serving—this sets the structure while keeping interiors cloud-soft. Remember, precise timing turns simple ingredients into something extraordinary.
Homemade Biscuits: Troubleshooting Common Issues
Even seasoned bakers encounter challenges when perfecting their craft. Whether your layers collapse or the flavor feels off, small adjustments can rescue your recipes. Let’s tackle common pitfalls and their fixes.
Tough texture? Overmixing is likely the culprit. Work the dough just until combined—visible butter flecks are good. If it feels dense, add 1-2 tablespoons of cold buttermilk to soften. As one baker advises:
“Handle dough like a fragile letter—gentle and purposeful.”
Uneven rise? Check your surface prep. Dust counters lightly with flour to prevent sticking without drying the dough. Press folds firmly but quickly—warm hands melt butter, reducing steam. For lopsided results, rotate the pan mid-bake.
Bland taste? Balance sugar and salt carefully. Too little salt mutes flavors, while excess sugar causes over-browning. Taste-test dry ingredients before adding liquids. A pinch of garlic powder or rosemary can elevate savory batches.
Use this quick-reference guide:
- Crumbly dough: Add buttermilk 1 tsp at a time
- Flat layers: Chill dough 15 minutes before baking
- Burnt bottoms: Use insulated baking sheets
Remember: Every batch teaches something new. Adjust recipes incrementally, and soon, tender flavor-packed results will become routine.
Innovative Serving Ideas and Creative Variations
Your golden pastries deserve more than a basic butter smear. Transform them into showstoppers that shine at brunch buffets or cozy family dinners. With simple tweaks, these versatile treats become edible canvases for sweet and savory creations.
Breakfast Sandwiches and Flavor Pairings
Slice warm rounds horizontally for stackable breakfast sandwiches. Layer scrambled eggs, crispy bacon, and melted cheddar between halves. For lighter options, try avocado slices with everything bagel seasoning. Pro tip: Toast cut sides briefly on a sheet pan to prevent sogginess.
Pair them with:
- Honey butter: Whip ½ cup softened butter with 2 tbsp honey
- Savory dips: Pimento cheese or garlic herb spread
- Dinner sides: Serve alongside chili or roasted chicken
Arrange pieces on a parchment-lined sheet for gatherings. This keeps bottoms crisp while showcasing their flaky tops. For upscale presentations, dust with powdered sugar or fresh herbs.
| Meal | Topping Ideas | Best Paired With |
|---|---|---|
| Breakfast | Berry compote, maple syrup | Yogurt parfaits |
| Brunch | Smoked salmon, cream cheese | Mimosa flights |
| Dinner | Herbed butter, gravy | Braised short ribs |
Freeze extras in zip-top bags for quick weekday meals. Thaw overnight, then reheat in a 350°F oven for 5 minutes. Their versatility ensures every bite feels fresh, whether you’re hosting or meal-prepping.
Time-Saving and Make-Ahead Biscuit Strategies
Busy mornings don’t have to mean skipping fresh-from-the-oven treats. With smart planning, you can enjoy warm pastries even on hectic days. These techniques preserve texture while maximizing efficiency.

Freezing, Reheating, and Batch Cooking Tips
Prepare dough in advance by shaping rounds and freezing them raw. Place pieces on a baking sheet lined with parchment, spaced 1 inch apart. Once frozen solid, transfer to airtight bags for up to 3 months. Bake straight from the freezer—just add 2-3 extra minutes.
Reheat leftovers in a 350°F oven for 5-7 minutes. Cover with foil to prevent drying. For single servings, microwave 10 seconds with a damp paper towel. This restores soft interiors without sacrificing crisp edges.
| Method | Prep Time | Storage Duration | Best For |
|---|---|---|---|
| Freeze Raw Dough | 15 mins | 3 months | Batch cooking |
| Refrigerate Baked | 5 mins | 3 days | Quick reheating |
| Room Temp Storage | 2 mins | 8 hours | Same-day serving |
Combine scraps gently when cutting rounds. Press them into a 1-inch thick slab instead of re-rolling. This minimizes gluten development for tender results. Use leftover pieces for mini versions—perfect for snacks or side dishes.
A pinch of baking soda in storage containers neutralizes odors. It also helps maintain rise during reheating. Always cool pastries completely before sealing to prevent sogginess.
Conclusion
Mastering the art of flaky layers starts with understanding the essentials. Keep cold butter and precise butter flour blending at the heart of your process. These steps create steam pockets that lift your biscuit dough into tender, airy stacks.
Remember: minimal mixing preserves texture, while sharp tools ensure clean cut biscuits that rise evenly. If challenges arise, revisit troubleshooting tips—like adjusting oven temps or reshaping scraps gently. Prep dough ahead using freezer strategies for stress-free mornings.
Experiment with flavors and pairings once you’ve nailed the basics. Swap herbs into the dough or drizzle honey over warm batches. Every tweak teaches you more about balancing science and creativity in baking.
Bookmark this guide for quick reference. Share your golden successes, and remember—great results come from patience, quality ingredients, and trusting the process. Now go preheat that oven!
FAQ
Can I substitute baking soda for baking powder?
No—baking soda requires acid (like buttermilk) to activate. Baking powder contains its own acid, so substitutions alter texture. Check your recipe’s liquid ingredients first.
Why is cold butter critical for flaky layers?
Cold fat creates steam pockets when baked, lifting the dough into distinct layers. Warm butter melts too early, resulting in dense, flat results.
How do I prevent tough, overworked dough?
Mix until just combined—visible flour crumbs are okay. Over-kneading develops gluten, which leads to a chewy rather than tender crumb.
What’s the best way to cut butter into flour?
Use a pastry cutter, fork, or grated frozen butter. Aim for pea-sized pieces coated in flour to ensure even distribution and optimal rise.
Why didn’t my biscuits rise evenly?
Uneven baking powder distribution, warm dough, or twisting the cutter can seal edges. Press straight down and rotate the pan mid-bake for consistency.
Can I freeze unbaked dough for later?
Yes! Shape and freeze raw dough on a tray, then transfer to a bag. Bake straight from frozen, adding 2–4 minutes to the original time.
How do I reheat leftovers without drying them out?
Wrap in foil and warm at 325°F for 8–10 minutes. For crispness, unwrap for the final 2 minutes or toast lightly in a skillet.
What meals pair well with this recipe?
Serve alongside soups, fried chicken, or breakfast eggs. For sweet variations, add honey or jam, or use them as shortcake bases.
How did you like the recipe?
There are no reviews yet. Be the first one to write one.